
When you pull a loaf of homemade sourdough from the oven, the crust crackles and the aroma fills your kitchen, inviting everyone to gather around. You might find yourself wondering how a few simple ingredients can transform into something so satisfying. The process of making bread is not just about following a recipe; it's about understanding the science behind fermentation and the art of kneading. What if there's more to this age-old craft that could elevate your baking game?
Key Takeaways
- Use warm water to activate yeast, ensuring your dough rises effectively for a light texture.
- Knead the dough for 5-8 minutes to develop gluten, creating a chewy bread consistency.
- Allow the dough to rise in a greased bowl, covered for about 1.5 hours, until doubled in size.
- Bake the shaped loaf at 220°C (425°F) for 30-40 minutes for a golden crust.
- Store cooled bread in an airtight container for 2-3 days or freeze for up to a month.
History
Bread has a rich history that stretches back thousands of years. You might be surprised to learn that evidence of fermented bread dates back to ancient civilizations, like Egypt around 3000 BCE, showcasing the clever use of wild yeast. Imagine the joy of those early bakers, discovering the magic of fermentation!
Sourdough, one of the oldest forms of bread, is believed to have originated around 1500 BCE, thriving on natural fermentation methods that remain popular today.
Fast forward to the 18th century, when the mechanical baker's oven revolutionized bread production. With this innovation, bakers could create consistent loaves and produce larger quantities.
The Industrial Revolution in the 19th century introduced commercial yeast, which drastically cut down the rising time, making bread-making more accessible to everyone. However, as supermarkets took center stage in the 20th century, traditional artisan bread-making began to decline.
But don't worry! In recent years, there's been a heartwarming resurgence of interest in homemade and artisanal bread, encouraging you to connect with the past while crafting your own delicious loaves.
Recipe
Homemade Bread Recipe
Making homemade bread is a rewarding experience that fills your kitchen with the delightful aroma of freshly baked goods. The process may seem intimidating at first, but with a few simple ingredients and some patience, you can create a wholesome loaf that your family will enjoy. This recipe utilizes basic pantry staples, allowing you to craft a delicious bread that's perfect for sandwiches, toasting, or simply enjoying with butter.
To begin, it's essential to verify your yeast is active, which is why warm water is a critical component of this recipe. The warmth activates the yeast, allowing it to work its magic and help the dough rise. Kneading the dough is another crucial step; it helps develop the gluten, giving your bread that desirable chewy texture. After rising, baking the bread at the right temperature will yield a golden crust and a soft interior, making it a delightful addition to any meal.
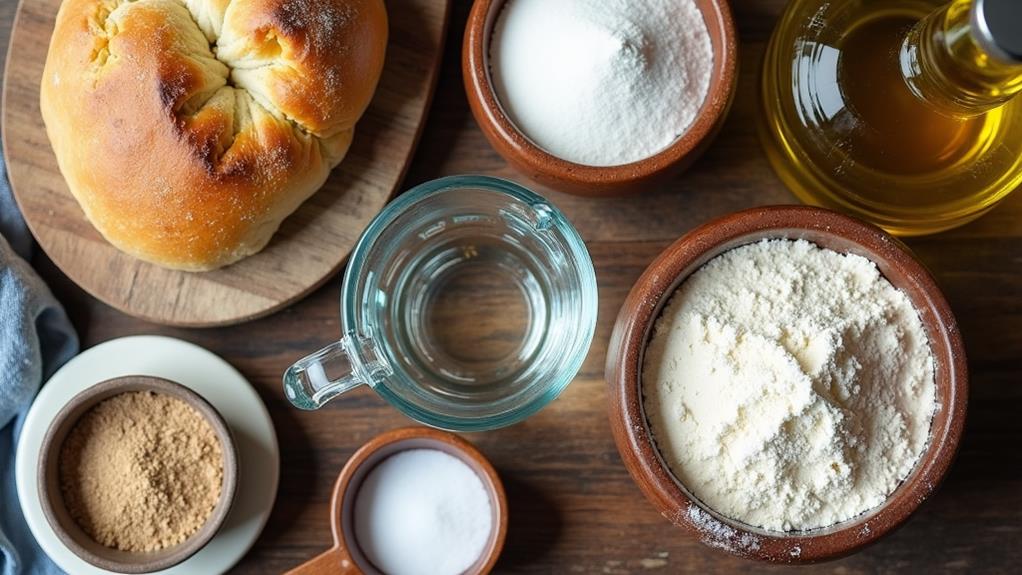
Ingredients:
- 1 cup warm water (105-115°F)
- 2 ¼ teaspoons active dry yeast
- 1 tablespoon sugar
- 2 teaspoons salt
- 2 tablespoons oil (vegetable or olive)
- 3 ½ cups bread flour (or all-purpose flour)
Instructions:
In a large mixing bowl, combine the warm water, yeast, and sugar, and let it sit for about 5 minutes until it becomes frothy.
Then, add the salt and oil, mixing well. Gradually incorporate the flour, one cup at a time, until a dough forms.
Transfer the dough to a floured surface and knead for 5-8 minutes until it's smooth and slightly sticky.
Place the kneaded dough into a greased bowl, cover with a damp cloth, and let it rise in a warm area until it doubles in size, approximately 1.5 hours.
Preheat your oven to 220°C (425°F).
Once risen, punch down the dough, shape it into a loaf, and place it in a greased loaf pan.
Bake for 30-40 minutes, or until it's golden brown and reaches an internal temperature of 190-200°F.
Extra Tips:
For the best results, verify your ingredients are at room temperature before beginning, and use a kitchen thermometer to check the water's temperature for the yeast.
If your dough is too sticky, add a little more flour until it feels right.
Additionally, you can experiment by adding herbs, cheese, or seeds to the dough for added flavor.
If you're looking for a crustier bread, try placing a shallow dish of water in the oven while baking to create steam.
Similar recipes include focaccia, which has a different texture and flavor profile but uses similar ingredients, and bagels, which also involve yeast but require boiling before baking.
You might also enjoy variations like whole wheat bread or adding grains and seeds for extra nutrition.
Final Notes
Baking your own bread opens up a world of delicious possibilities and allows you to tailor the recipe to suit your tastes. You can control the ingredients, making healthier choices while experimenting with flavors.
After mixing your dough, let the dough rise for about an hour; this step is essential for achieving that perfect texture. Once it's risen, shape the dough into your desired loaf form, then pop it in the oven. The aroma will fill your kitchen, and soon you'll have a warm, crusty loaf ready to enjoy.
Once your bread is baked, let it cool completely before slicing. This is important; if you slice too soon, it may become gummy.
After cooling, you can store your bread in an airtight container at room temperature for 2-3 days, or freeze it for up to a month if you want to save some for later. Remember, a successful recipe typically yields about 10-12 slices, making it perfect for sharing—or enjoying all by yourself!
And don't forget, connecting with fellow bakers can inspire you to innovate even further. Happy baking!